
Core Wins, Policy and DCI

More Siteimprove Tools to Improve Your Website
In addition to the Siteimprove modules covered in this section, you’ll find several other features that can help you evaluate your website, manage content, and complete common web-related tasks. Whether you’re searching for content used across multiple pages or looking for additional insights into your site’s performance, these tools can help you work more efficiently.
If you’re ready to explore more of what Siteimprove has to offer, take a look at the Core Wins, Policy, and Digital Certainty Index features to discover additional ways to improve your website.
Additional Features to Maintain Your Website
In this tutorial, you’ll learn about Siteimprove’s additional performance modules and features that can help you monitor your website’s health, prioritize tasks, and manage your workload more efficiently.
Core Wins
Core Wins helps you focus on the outcomes that matter most to users by bringing together insights from across the Siteimprove Platform. It uses the Quality Assurance, Accessibility, and SEO modules to identify pages and issues that need attention, helping you prioritize improvements that can enhance the overall user experience.
Use the step-by-step guide below to learn how to review accessibility, quality assurance, and search issues on your site. Please note that this guide is intended as a supplemental resource and is not a substitute for formal Siteimprove training offered by UMC and Information Systems.
Navigating to Core Wins
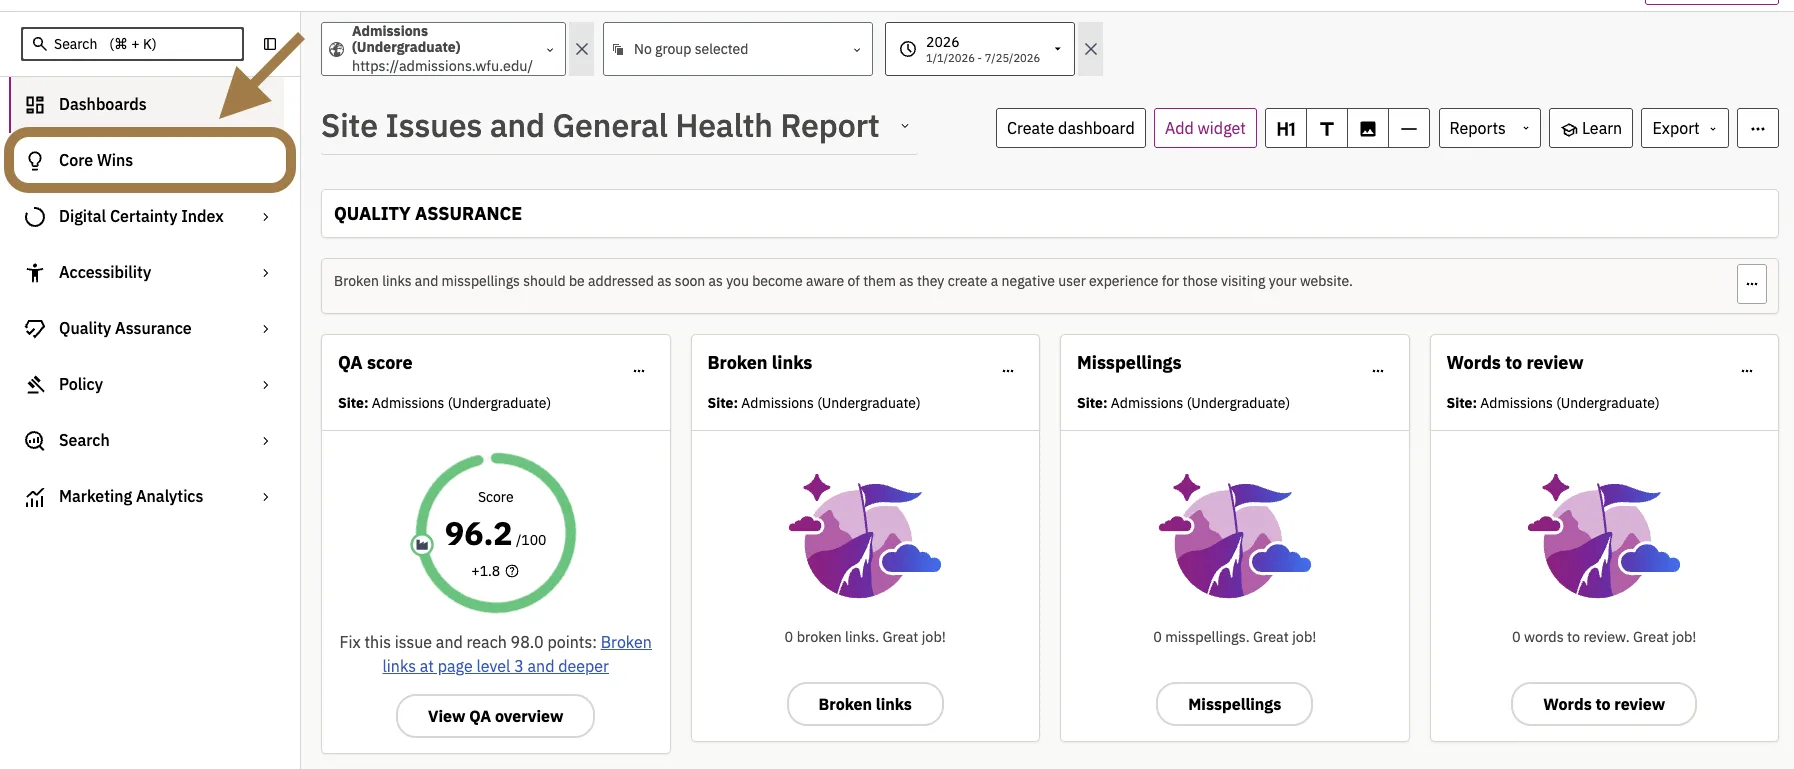
Once you’re logged into Siteimprove, select Core Wins from the left-side navigation panel. This will direct you to the Core Wins Dashboard.

Core Wins Dashboard
Once you’re logged into Siteimprove, select Core Wins from the left-side navigation panel. This will direct you to the Core Wins Dashboard.
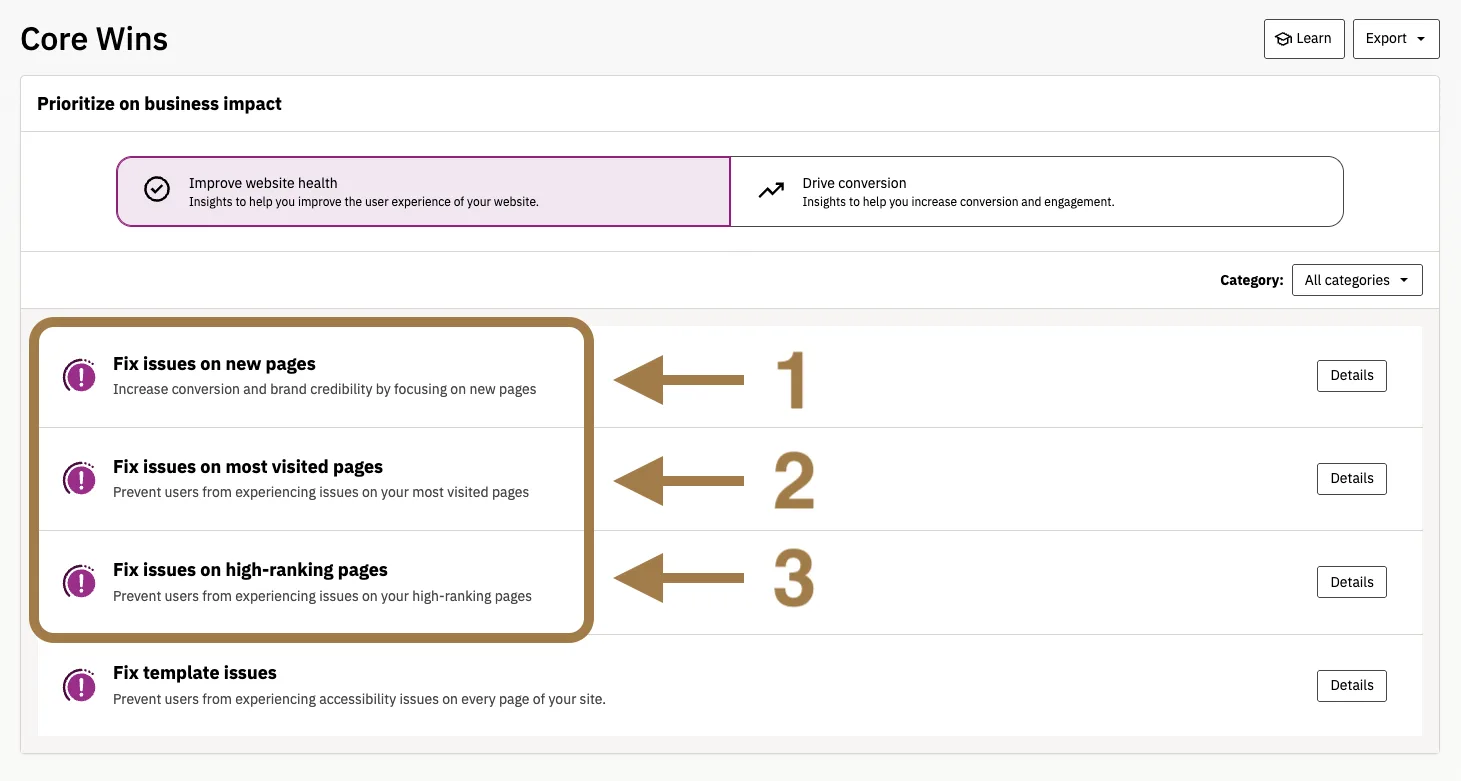
We recommend starting with issues on most visited or high-ranking pages. For this tutorial, we’ll use Fix issues on most visited pages.
Insight Details
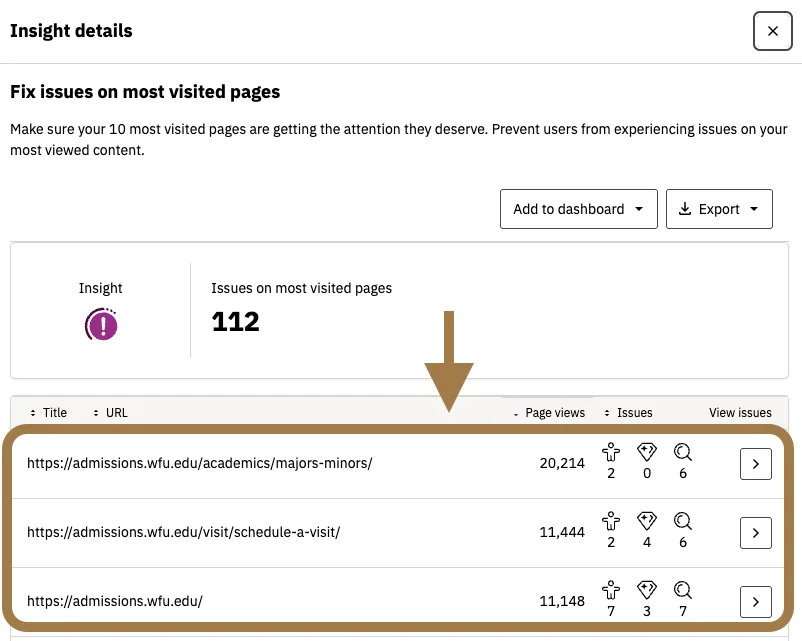
On this screen, you’ll see the issues identified on your most-visited pages, along with the number of issues found. The table below lists the URL for each affected page and the types of issues identified.
Issues are categorized as Accessibility, Quality Assurance, or SEO.
Click the arrow to the right of the page URL to view the specific issues identified.
Fixing the Issue
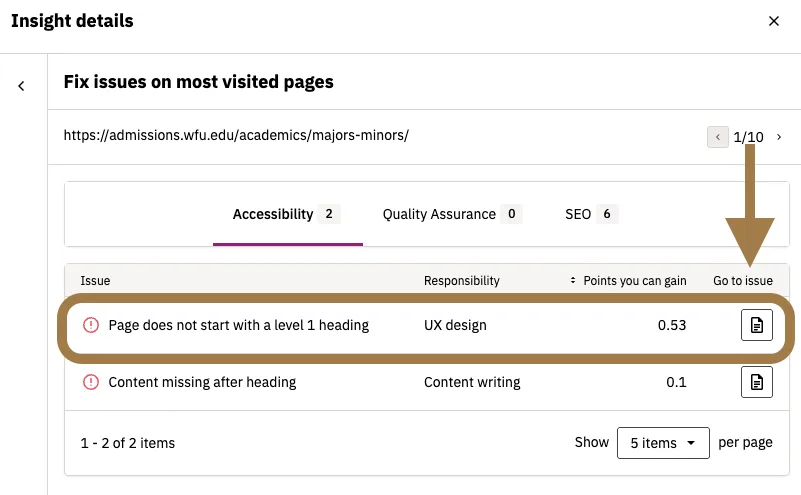
You’ll now be presented with information on the specific issue and category it falls within. Click on the icon underneath Go to issue. This will open a new tab where the page that the issue occurs on will be displayed.
To begin the link remediation process, click on the CMS button at the top of the page.
Note: You’ll need to be logged into your WordPress site for this to work.

This will redirect you to the backend of the page in WordPress. From here you can correct the link and save the page once you’re done.
If you have additional issues that need to be fixed, go back to your browser tab with Siteimprove that has the table of broken links (as shown in the step previous to this one). Identify the next link that needs to be fixed and repeat the process outlined in this step.
Need additional help? Take a look at our Broken Links, Accessibility, and Search tutorials.
Policy
The Siteimprove policy feature acts as a website-wide search tool to enforce consistency and control content by scanning for designated words, documents, or media files. It allows users to create custom rules to flag and report on specific content, ensuring it meets organizational standards or guidelines.
Use the step-by-step guide below to learn how to create policies, e.g. search and replace, on your site. Please note that this guide is intended as a supplemental resource and is not a substitute for formal Siteimprove training offered by UMC and Information Systems.
Navigating to Policy
Once you’re logged into Siteimprove, select Policy from the left-side navigation panel. This will direct you to the Policy Dashboard.
For this tutorial, we’re going to focus on how to create a policy to search for content on your site.
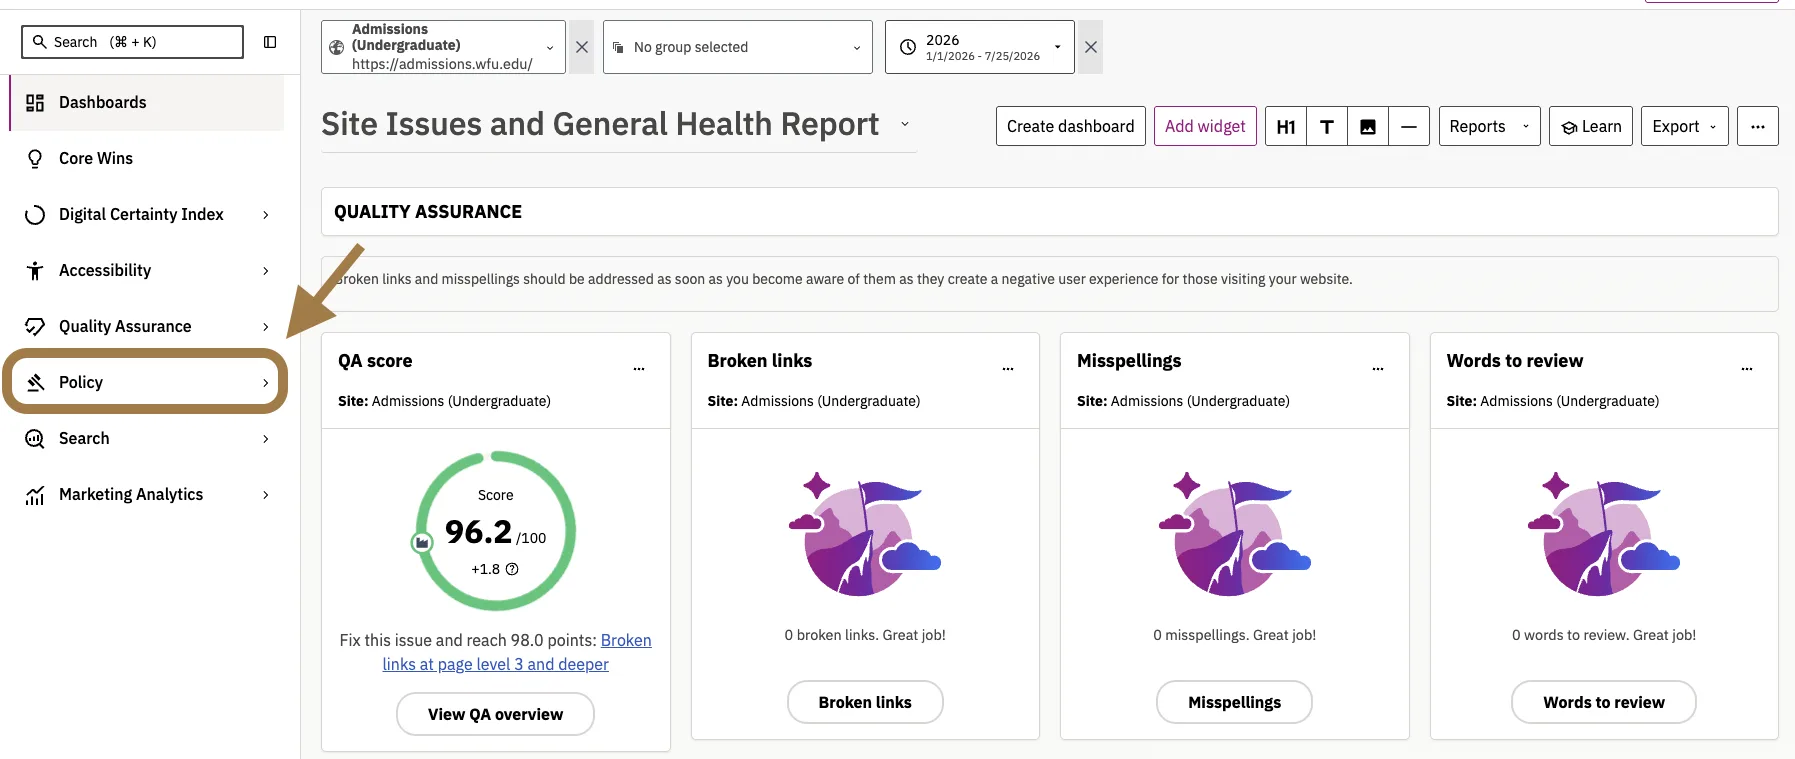
Policy Dashboard
Once you’re on the Policy Dashboard, click on Active policies from the left-side menu.
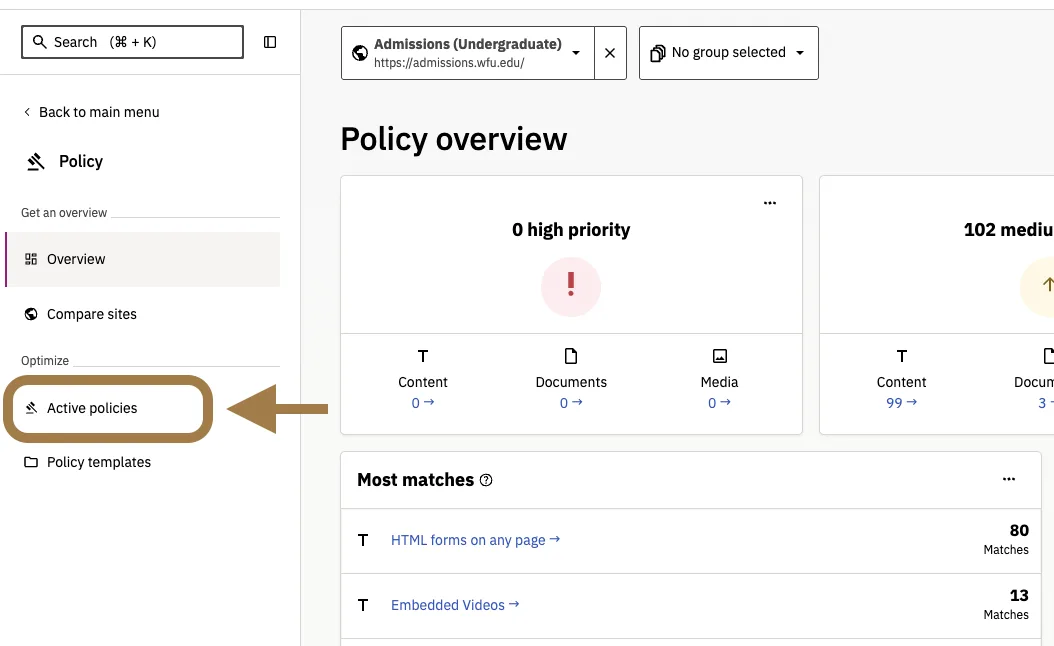
Active Policies
On this screen, you’ll see any policies that are active on your site. Note: These could be policies that were created by Siteimprove or ones that are applied on every wfu.edu site.
To create a new search policy, click Create policy at the top of the screen.
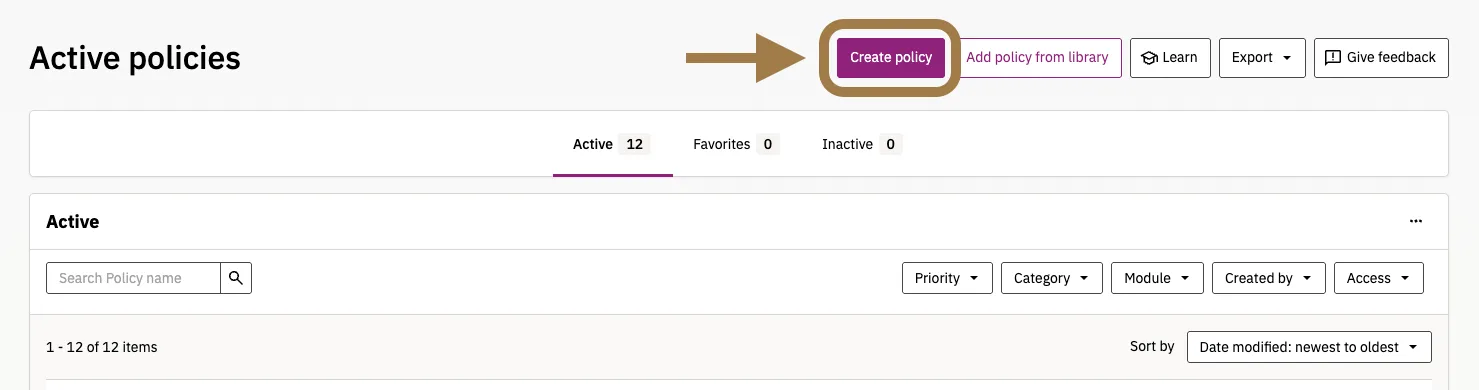
Creating a New Policy
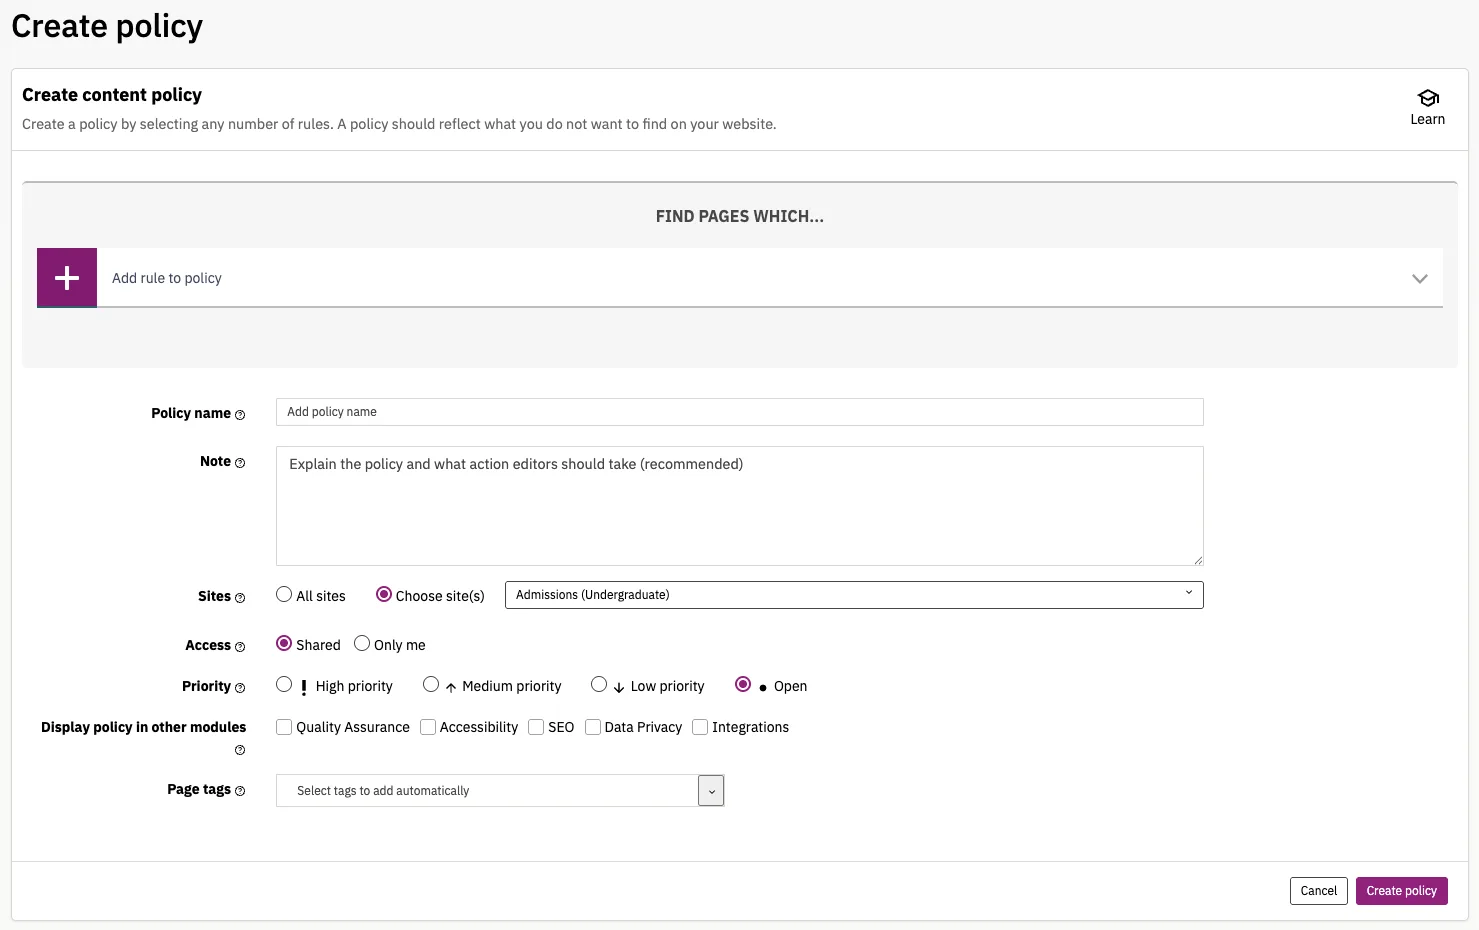
- Click the Create Policy button found on the My policies screen
- Select the relevant category for your policy and then apply any number of available rules.
- Content: Looks for published content on your site (most common for searching your site for a word or phrase, link, email address, phone number, etc.)
- Media: Policies relating to media files. Rules can be added for file type, location, size, age and referring pages.
- Documents: Policies relating to documents, such as PDFs, Microsoft Office files, etc.
- Once selected, add a rule to the policy. You can select the rule from the dropdown box.
- Give your policy a name (i.e. Deacon word search)
- Add a note if you are sharing this policy with others and the name is not descriptive enough or does not go into enough detail to explain the policy.
- Choose if you want to search just the site that’s selected, or if you are a user on multiple sites, if you want to search some or all of them.
- Note: If you need to do a search across the entire wfu.edu website, please reach out to UMC so we can assist you with this.
- For Access, choose whether or not you want this policy to be shared by all Siteimprove users (Shared) and those who are users on your site, or if you want to be the only one who can see it (Only me).
- Choose a priority level. (Note: It’s usually fine to leave this as “Open”)
- Leave the “Display policy in other modules” and “page tags” fields blank.
- Click the Create Policy button.
Depending on the criteria for your search, and how many sites you’re searching, it could take anywhere from a few to several minutes for your policy search to complete. When it has completed, you will be able to see any matches that Siteimprove was able to find.
Digital Certainty Index
Siteimprove’s Digital Certainty Index (DCI) measures the quality and potential impact of your site’s digital presence, including its accessibility and usability, its credibility and trustworthiness, and how well-poised it is to respond to SEO challenges. The final DCI score is calculated as an overall score of points awarded in three categories: Accessibility, Quality Assurance, and SEO.
Most issues shown on this dashboard are also available in the corresponding Accessibility, Quality Assurance, and SEO dashboards. We recommend addressing issues within those individual dashboards first, as this allows you to focus on one category at a time.
However, if you prefer to see how many points you can gain by resolving issues across your site—with a higher score indicating better overall performance and site health—this dashboard can be a useful place to explore.
Your Siteimprove Toolbox

Quality Assurance
Discover the steps you can take to create a more effective, engaging, and user-friendly website experience for everyone.

Analytics
A successful content strategy starts with understanding how your website is performing and what your audience is looking for.

Accessibility
Accessibility isn’t just about what happens behind the curtain—it’s about the experience everyone has in front of it.

SEO & Search
Understanding how visitors find your website and what they want is an essential step in developing an effective content strategy.
Online Presentations
Whether you’re planning to attend an upcoming digital strategy presentation or want to revisit a previous session, explore the topics we cover and resources we share.
Digital Strategy
A strong digital strategy serves as the foundation for your website and every aspect of your digital marketing and communications. Here’s what you need to know.
Want to Chat?
We’re here to support your digital strategy efforts. Reach out with questions or schedule a consultation to discuss your website strategy and explore opportunities for improvement.